Using the Admin Panel
A walkthrough of the built-in local admin panel — creating posts, editing frontmatter, uploading images, and previewing your content.
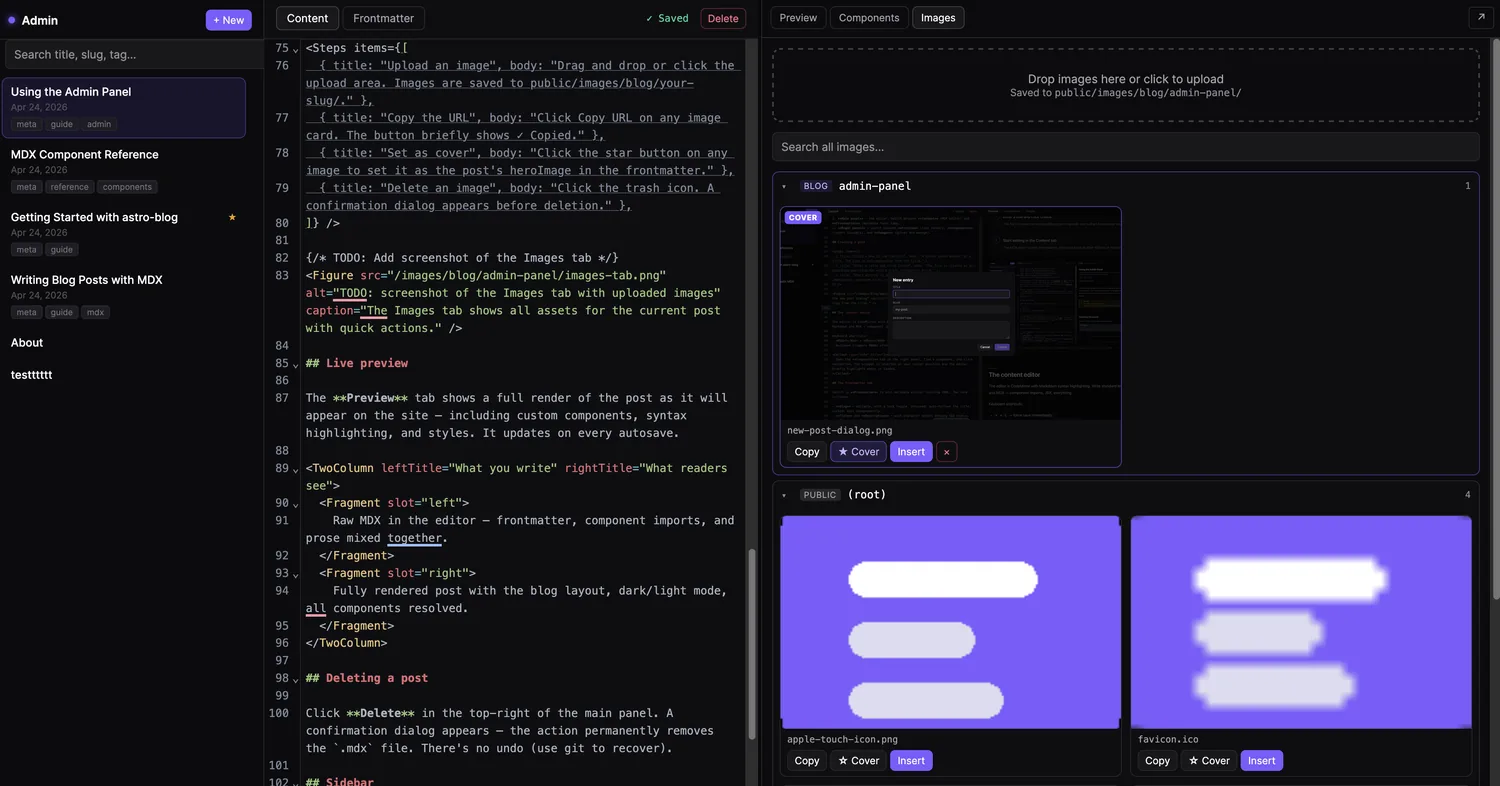
Table of contents
The admin panel is a local-only editor that runs alongside your dev server. It reads and writes the same .mdx files you’d edit by hand — no database, no sync, just files. It’s designed for comfortable writing without switching to your code editor for every metadata change.
Dev only
The admin panel is only available at http://localhost:4321/admin/ during local development. It’s excluded from production builds via the Astro sitemap config.
Opening the panel
Start the dev server and navigate to the admin URL:
bun run dev
Layout overview
The panel has three columns:
- Left sidebar — list of all posts with search, date, and tags. Click a post to load it.
- Main panel — the editor. Switch between Content (MDX editor) and Frontmatter (metadata form) tabs.
- Right panel — switch between Preview (live render), Components (insert snippets), and Images (upload and manage).
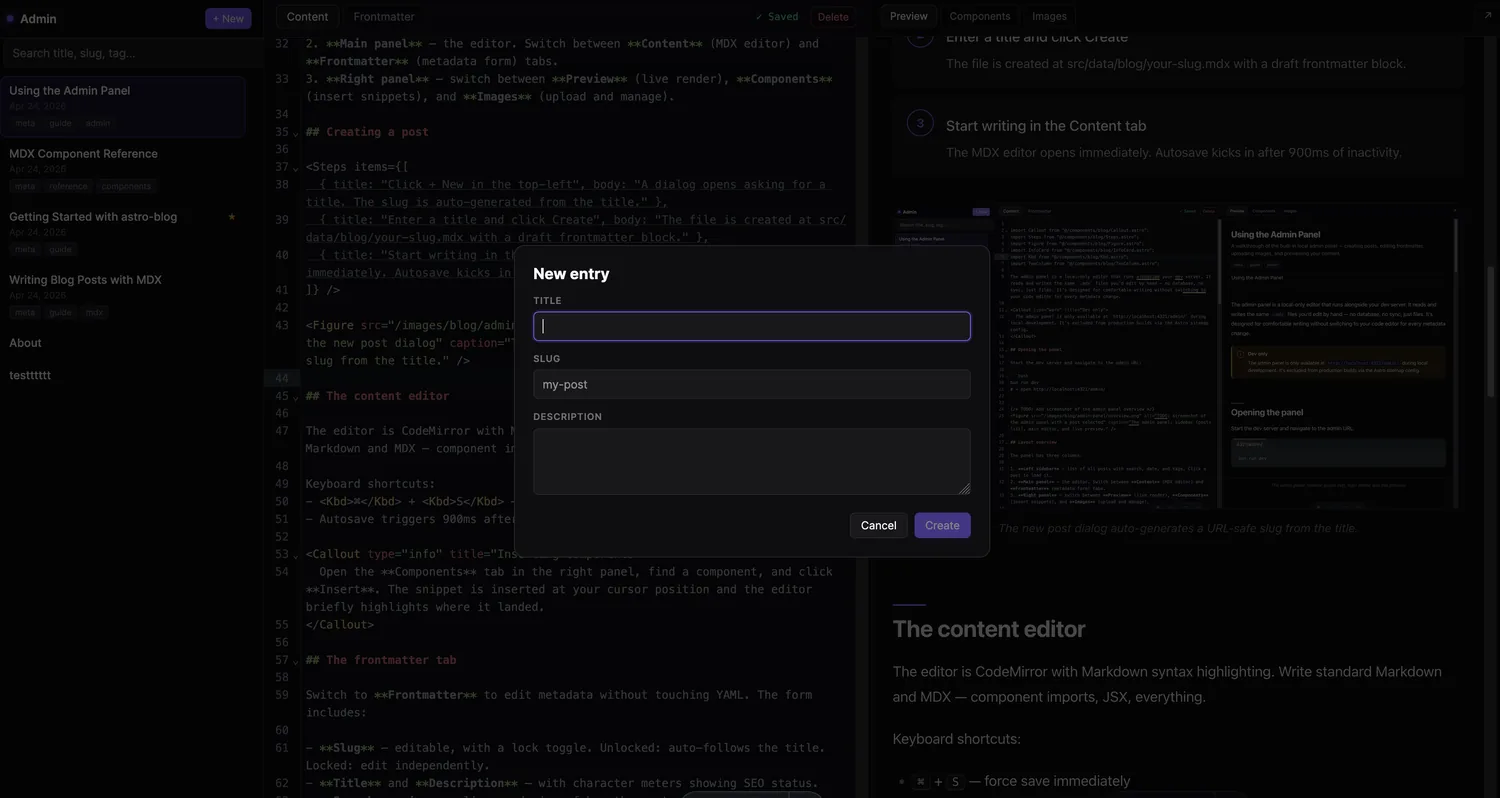
Creating a post
- 1
Click + New in the top-left
A dialog opens asking for a title. The slug is auto-generated from the title.
- 2
Enter a title and click Create
The file is created at src/data/blog/your-slug.mdx with a draft frontmatter block.
- 3
Start writing in the Content tab
The MDX editor opens immediately. Autosave kicks in after 900ms of inactivity.
The content editor
The editor is CodeMirror with Markdown syntax highlighting. Write standard Markdown and MDX — component imports, JSX, everything.
Keyboard shortcuts:
- ⌘ + S — force save immediately
- Autosave triggers 900ms after you stop typing
Inserting components
Open the Components tab in the right panel, find a component, and click Insert. The snippet is inserted at your cursor position and the editor briefly highlights where it landed.
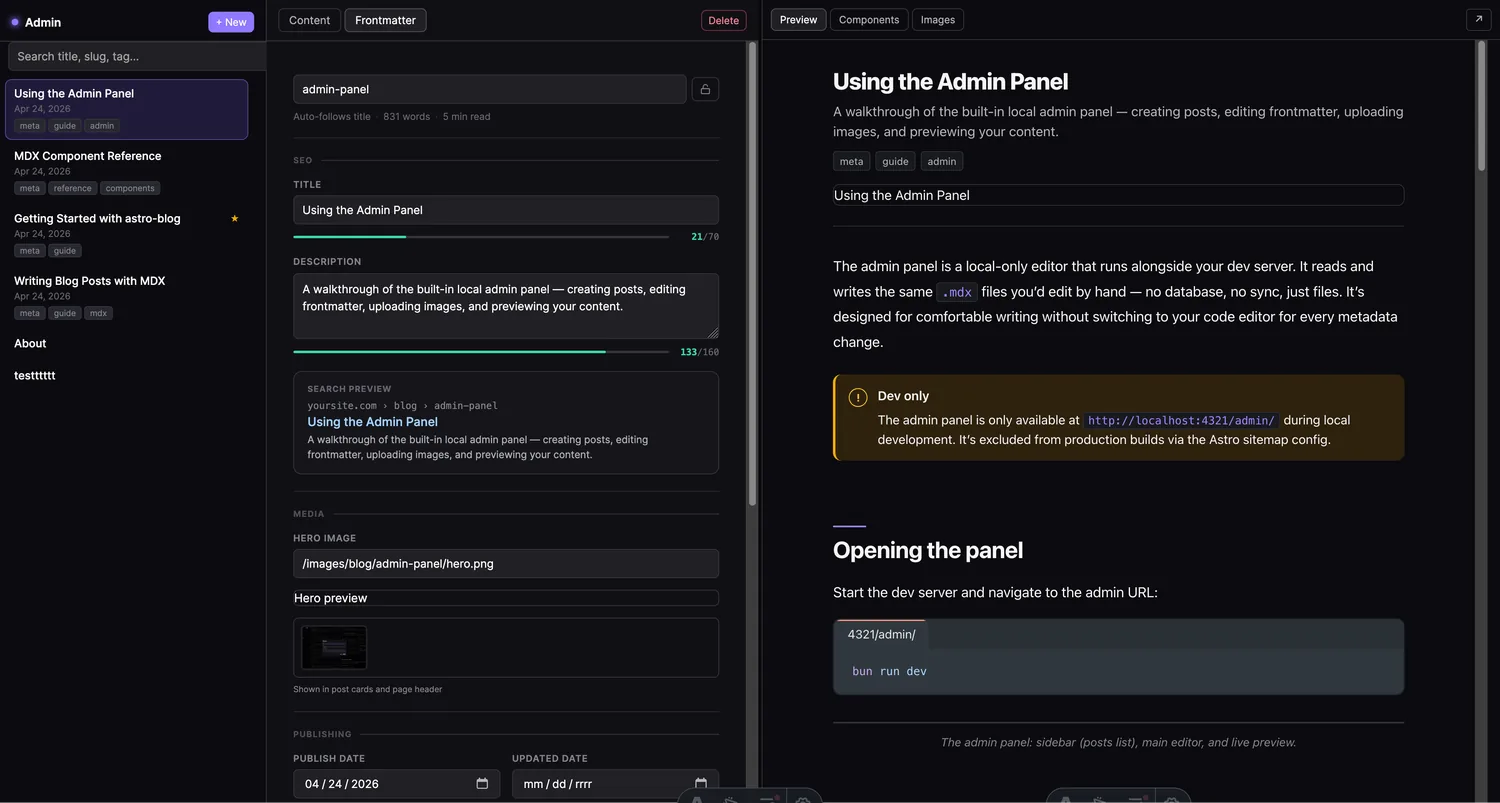
The frontmatter tab
Switch to Frontmatter to edit metadata without touching YAML. The form includes:
- Slug — editable, with a lock toggle. Unlocked: auto-follows the title. Locked: edit independently.
- Title and Description — with character meters showing SEO status.
- Search preview — live rendering of how the post appears in Google.
- Hero image — text input plus a picker that shows images already uploaded for this post.
- Publish date and Updated date — date pickers.
- Author and Tags — tag badges (press Enter or comma to add).
- Draft and Featured toggles.
Managing images
Click the Images tab in the right panel to see all images uploaded for the currently open post.
- 1
Upload an image
Drag and drop or click the upload area. Images are saved to public/images/blog/your-slug/.
- 2
Copy the URL
Click Copy URL on any image card. The button briefly shows ✓ Copied.
- 3
Set as cover
Click the star button on any image to set it as the post's heroImage in the frontmatter.
- 4
Delete an image
Click the trash icon. A confirmation dialog appears before deletion.
Live preview
The Preview tab shows a full render of the post as it will appear on the site — including custom components, syntax highlighting, and styles. It updates on every autosave.
What you write
Raw MDX in the editor — frontmatter, component imports, and prose mixed together.
What readers see
Fully rendered post with the blog layout, dark/light mode, all components resolved.
Deleting a post
Click Delete in the top-right of the main panel. A confirmation dialog appears — the action permanently removes the .mdx file. There’s no undo (use git to recover).
Sidebar
The sidebar lists all posts with:
- Title and draft/featured badges
- Publish date
- Tags (up to 3 shown,
+Nfor the rest)
Use the search box to filter by title, slug, or tag.
Files are just files
Everything the admin panel does is a read or write to the src/data/blog/ directory. You can edit files in your code editor at the same time — the panel reloads on file changes.